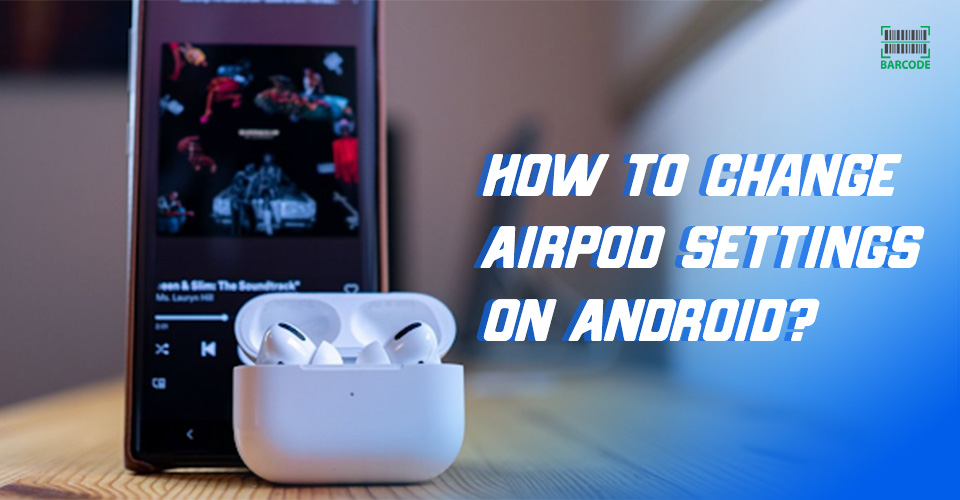
5 Best AirPods Pro Tips To Master Your Wireless Earphones
Feb 01, 2023 - Views:
3119
![]()
![]()
![]()
Regardless of whether you recently purchased your first pair or have been a seasoned user for years, there are several settings in the Apple AirPods Pro that you possibly aren't aware of.
But don't worry!
To help you make the most of your products, we've provided several AirPods Pro tips and tricks below.

Some easy AirPods Pro tips
Test Your Ear Tip Fit
Despite having a one-size-fits-all design, the Apple AirPods Pros do come with three different-sized ear tips to assist you in finding the right fit.
Attach a pair of the tips to the base of each AirPod Pro to check how well they fit.
After that, place both AirPods in each ear. Navigate Settings > Bluetooth > [Your AirPods info icon] > Ear Tip Fit Test on your iPhone.
Then, your iPhone will play some music through your headphones, so check whether you are getting a decent fit or want to test a different ear tip size.
Change The Name
Your Apple ID's first name, followed by AirPods Pro, will be automatically assigned to your AirPods. But it's not binding on you.
If you go to Settings > Bluetooth > Your AirPods' Name and choose the "Name" bar at the very top of the screen, you may jazz things up.
The name can then be altered or deleted and a brand-new name can be created. Tap Done when you’re finished.
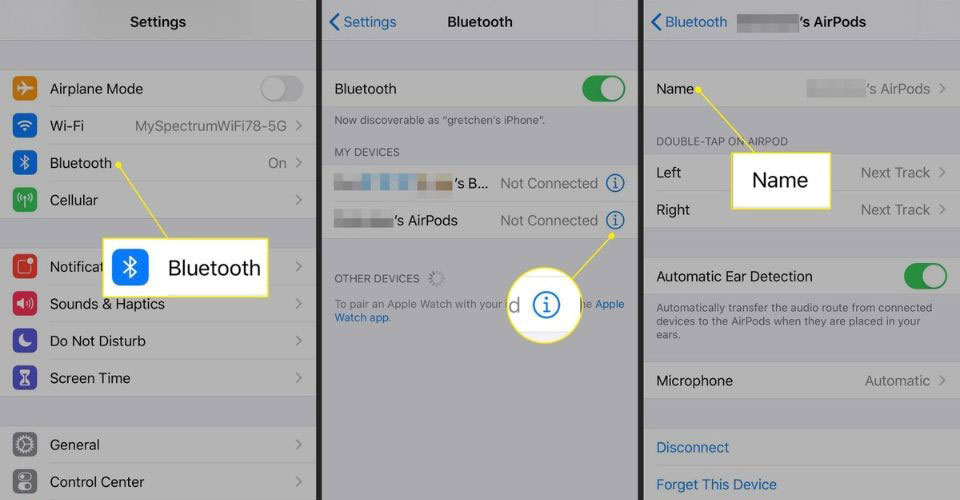
Change the name of your AirPods Pro
Use The Controls On Your Earbuds
By pressing the stem of your left or right AirPods Pro, you may adjust the music flow.
You must squeeze the stem firmly until you hear a low click to do this.
Press once to start/stop the music, twice to go to the next track, and three times to go back to the beginning of the current track or the previous one.
Personalize Your Presses
For either AirPod Pro, you can change the way that pushing the stem alternates between Noise Cancellation and Transparency.
Go to Settings > Bluetooth and click the info symbol next to your AirPods. Then, select Left or Right by tapping the entry under Press and Hold AirPods.
When you long-press on this button, Noise Control will continue to be activated.
However, you can also add the Off setting by tapping on the entry.
Optionally, you can switch the action from Noise Control to Siri by tapping the Siri entry at the top.
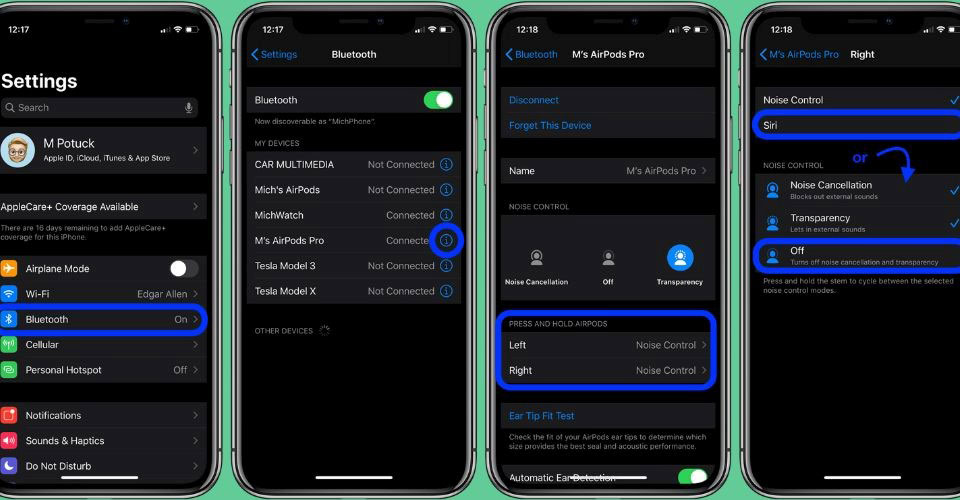
Customize your presses
Tweak Accessibility Settings
Navigate Settings > Accessibility > AirPods to make more adjustments to your AirPods.
Here, you can adjust your press speed and press and hold duration on this screen. With one earbud, you may also turn on noise cancellation.
Besides, hit the "Audio Accessibility Settings" button near the bottom of the screen for more settings, such as turning on mono audio and masking background noises.
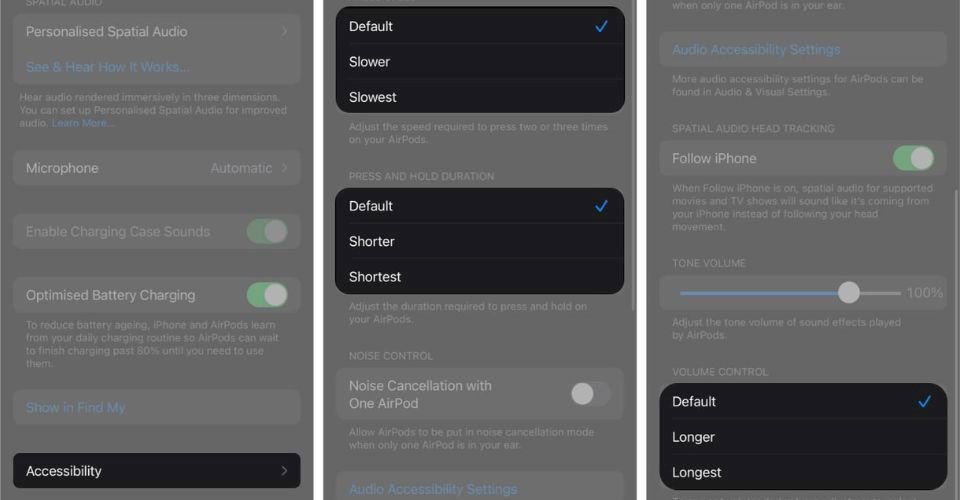
Tweak Accessibility settings in your AirPods Pro
By now, we hope you are confident in mastering your earbuds. Then, have a look at Apple Airpods Pro - White 190199247000 review to find its outstanding features!
There are three sizes of silicone ear tips included with your AirPods Pro: small, medium, and large.
You will receive the finest sound quality and optimum noise cancellation if you use the right-sized ear tips.
Transparency mode, Active Noise Cancellation, and Off are the three noise-control settings of AirPods Pro.
Based on how much of your surroundings you wish to hear, you may switch between them.
Although AirPods Pro (1st and 2nd generation) are sweat and water-resistant, they are not sweatproof or waterproof.
Conclusion
Mentioned above are just 5 out of many AirPods Pro tips that you may not know. Follow us to get more interesting information!
![How to Turn on AirPods Without Case? [iOS, Android, MacOS & Windows]](https://barcodelive.org/filemanager/data-images/imgs/20231003/How%20to%20Turn%20on%20Airpods%20Without%20Case/how-to-turn-on-airpods-without-case-1.jpg)
11 Comments
Sirish Narula
Nicely written
Leave a Comment
Your email address will not be published. Required fields are marked *Barcodelive
thanks
Leave a Comment
Your email address will not be published. Required fields are marked *sarah
is there a way to use airpod pro and AirPod max in mono? I have hearing in only one ear so I can’t really enjoy stereo headphones. I would like to use them as mono headphones. I have iPhone 11 if that helps
Leave a Comment
Your email address will not be published. Required fields are marked *Barcodelive
You can adjust the audio balance under Settings > Accessibility > Audio/Visual. This will also affect output from the iPhone’s speakers.
Leave a Comment
Your email address will not be published. Required fields are marked *Ronald Morris
Second-gen AirPod Pro don’t appear to work well with 1st gen comply foam tips, despite the company assuring me they are compatible
Leave a Comment
Your email address will not be published. Required fields are marked *Padama Chauhan
They said the 2nd gen airpods pro uses other mesh tips variant. Buy the 2nd gen foam tips
Leave a Comment
Your email address will not be published. Required fields are marked *Kelly
I'm using mine with the comply tips right now and notice the bass is A LOT better with the APP 2, though at the expense of some treble.
Leave a Comment
Your email address will not be published. Required fields are marked *Mitesh Singhal
going to buy airpod pro, need honest suggestion from pro/long listener users I will use airpod pro mainly on windows 10 for teams calling and on android samsung music thanks
Leave a Comment
Your email address will not be published. Required fields are marked *Ryan Shaw
If your going to use them on a pc you can get a headset with a much better microphone and sound for the price of AirPods
Leave a Comment
Your email address will not be published. Required fields are marked *Yamini Madan
My AirPod pro’s have been on my charging base for a few days, but they were dead when I went to use them. The case was at 100% charge.
Leave a Comment
Your email address will not be published. Required fields are marked *Harry Edwards
The contacts might be dirty
Leave a Comment
Your email address will not be published. Required fields are marked *Leave a Comment
Your email address will not be published. Required fields are marked *